
Wheel alignment is often a neglected aspect of vehicle maintenance, overshadowed by more familiar tasks like oil changes or tire rotations. However, minor misalignments can quietly disrupt your car’s performance over time, leading to premature tire wear, compromised handling, and, ultimately, an unnecessary dent in your wallet. Understanding wheel alignment is essential—it’s not just about making your vehicle look straight on the road; it’s about enhancing safety, efficiency, and longevity.
Imagine this: you’re behind the wheel, feeling the serene flow of the road beneath you, when suddenly you notice your car veering slightly to one side. The thrill of driving is replaced by frustration, and you start to wonder if it’s time to take action. But fear not! With a little know-how, you can take the reins and tackle a do-it-yourself wheel alignment that empowers you and keeps your vehicle running smoothly. Let’s delve into this fascinating realm and uncover the toolset, techniques, and transformations awaiting your endeavor.
Understanding Wheel Alignment
Before embarking on your wheel alignment journey, it is crucial to grasp the basics. Wheel alignment refers to the adjustment of your vehicle’s suspension—the system that connects the vehicle to its wheels and allows for steering and absorption of shocks. The key components at play are camber, caster, and toe, each influencing how the tires maintain contact with the road.
- Camber: This angle measures the tilt of the wheels from vertical. Positive camber leans outward, while negative camber leans inward. Ideally, you want a slight negative camber for enhanced cornering stability.
- Caster: This angle concerns the steering axis’ tilt when viewed from the side. A positive caster improves straight-line stability, essential for smooth driving.
- Toe: This refers to the orientation of the tires concerning the centerline of the vehicle. Toe-in means the front of the tires is closer together than the rear, while toe-out is the opposite. Proper toe alignment ensures even tire wear and optimal handling.
Recognizing the necessity of correct alignments is the first step towards ensuring your vehicle is road-ready and efficient.
Gathering Your Tools
Equipped with knowledge, it’s time to gather the essentials. You won’t require an elaborate workshop; a simple driveway or garage will suffice. Here’s a list of tools you’ll need:
- Wheel alignment tool or alignment rack (if you can access one)
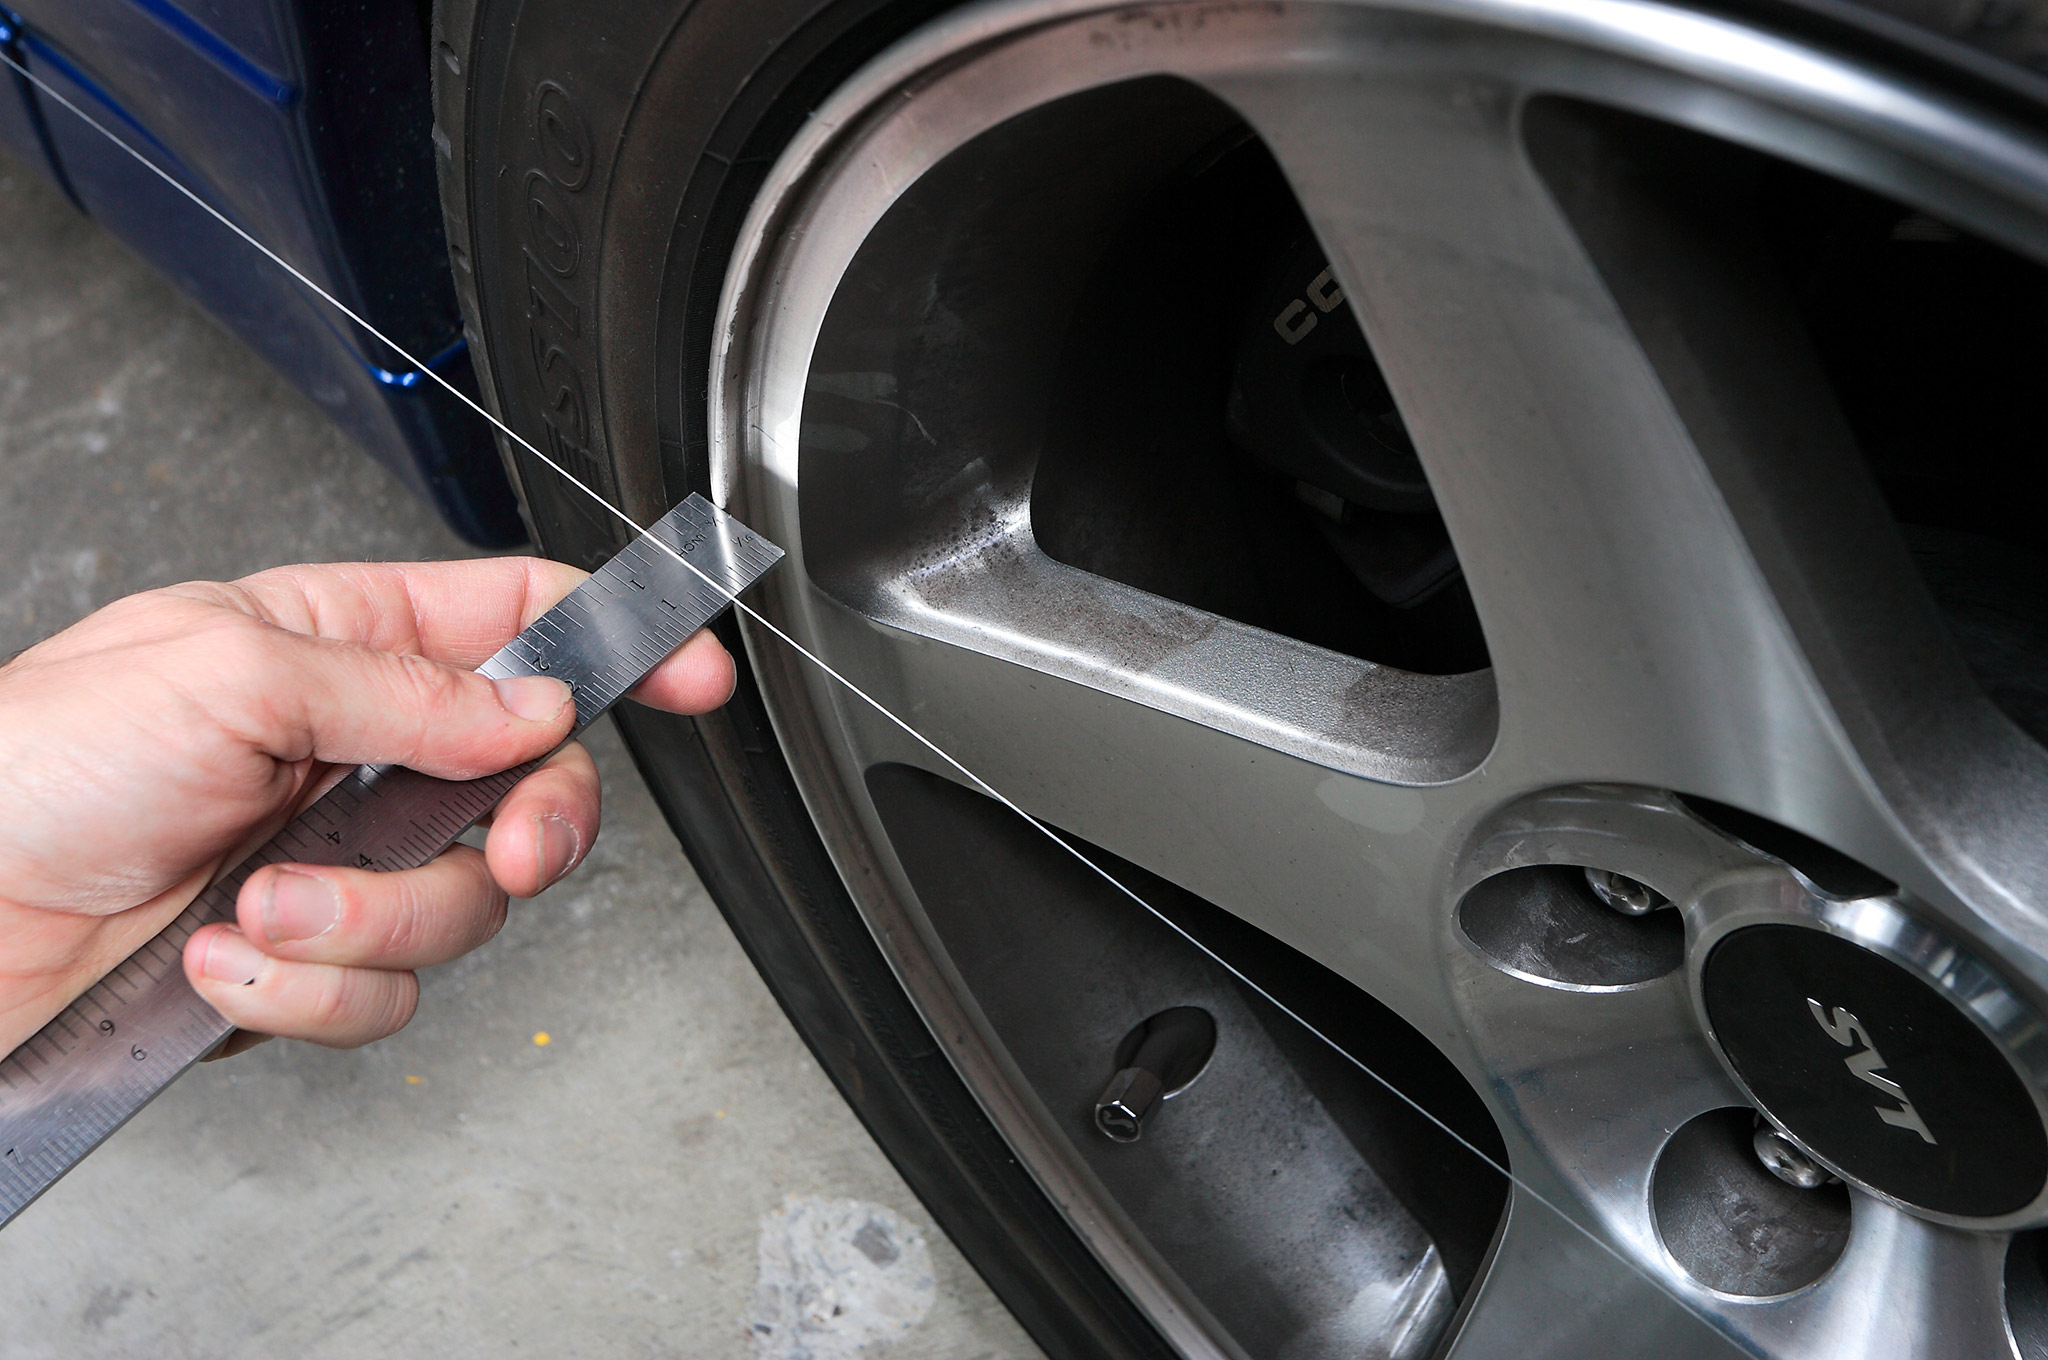
- Tape measure
- Protractor or inclinometer
- Jack and jack stands
- Socket set and wrenches
- Chalk or a marker for marking adjustments
- Level (for accurate measurements)
While the investment in a wheel alignment tool can be significant, consider it a long-term investment in your vehicle’s health. That said, if you’re looking for a more wallet-friendly approach, the tape measure and protractor are adequate for basic alignments.
Preparing for Alignment
Before getting your hands dirty, ensure your vehicle is ready for alignment. Here are a few preparatory steps:
- Check tire pressure: Ensuring all tires are inflated to the recommended pressure is crucial. Misaligned tires at different pressures can skew alignment readings.
- Inspect suspension components: Look for any signs of wear, such as worn bearings, damaged shock absorbers, or loose parts. Addressing these issues is vital before aligning the wheels.
- Ensure the car is on a flat, level surface: An incline can lead to inaccurate measurements. Parking your vehicle on a flat surface helps in maintaining consistency throughout the process.
Once all preparations are complete, it’s time to dive into the alignment process.
DIY Wheel Alignment: Steps to Follow
Begin the alignment process systematically, ensuring precision in every step. Here is a simple guide:
- Find a reference point: Use your tape measure to find the centerline of your vehicle. Measure from the front of the front tires to the back of the rear tires and jot down the measurements.
- Check the camber: Use your protractor or inclinometer to measure the camber angle. Adjust the top of the wheel inwards or outwards as needed. Remember, you’re aiming for a slightly negative camber for optimal performance.
- Measure caster: This may require adjusting the position of the control arms or, in some cases, the strut plates. Adjust until the caster angle falls within the manufacturer’s recommended range.
- Check and adjust toe: To measure toe, take the front measurement and subtract it from the rear measurement. Adjust the tie rods to correct the toe settings as required. A slight toe-in is usually desirable.
Verification is key. Always double-check your measurements after making adjustments, as miscalibrations can lead to unwanted effects on your vehicle’s handling.
The Road Ahead
Post-alignment, you may notice an invigorated driving experience. Your vehicle should glide gracefully across the asphalt, a testament to your newfound knowledge and skills. Regular maintenance of your wheel alignment can prevent wear and tear, allowing your tires to last longer and perform better.
By embracing the do-it-yourself approach, you not only save financial resources but also cultivate a deeper connection with your vehicle. It’s about understanding the delicate balance your car maintains and respecting its mechanical body.
Transforming your perspective on wheel alignment offers a thrilling sense of autonomy and expertise. Remember, knowledge is power—fueling your curiosity will help keep your vehicle in pristine condition, igniting your passion for exploration and adventure on the open road.
