
The world of automotive customization and repair often demands innovative solutions, especially when it comes to creating intricate parts that can withstand the rigors of the road. Fiberglass, known for its lightweight and durable properties, has become a popular medium for fabricating everything from body panels to intricate interior features. If you’re an automotive enthusiast looking to dive into the realm of DIY fiberglass mold making, this guide will provide you with a comprehensive overview on how to craft a fiberglass mold for automotive components.
To embark on your fiberglass journey, it is essential to understand the fundamental concepts surrounding fiberglass as a material. Fiberglass is a composite material made from fine fibers of glass, which are woven together and then infused with a resin. The result is an incredibly strong and lightweight product suitable for automotive applications. Creating a fiberglass mold involves a series of meticulous steps, from constructing the original part to crafting the mold itself.
Understanding the Key Components
Before kicking off your project, it is paramount to gather your materials and tools, which include:
- Fiberglass cloth: Choose different weaves based on the strength and finish you desire.
- Resin: Polyester or epoxy resin are commonly used; each offers distinct properties.
- Mold release agent: This will ensure easy removal of the finished mold.
- Brushes and rollers: For applying resin smoothly over your fiberglass cloth.
- Mixing cups and stir sticks: For combining resin with hardener.
- Protective gear: Safety glasses, gloves, and masks are indispensable.
Now, with your materials at the ready, the first step in creating a fiberglass mold is to have a master pattern or the specific part you wish to reproduce. This master could be an original OEM part or even a hand-crafted design. Regardless of your choice, it must be meticulously detailed, as the mold will replicate the contours and features of this original piece.
Creating the Master Pattern
For the master pattern, use materials such as clay, wood, or pre-existing parts. Ensure that the surface of the master is smooth and devoid of imperfections, as these will be amplified in the final mold. If you’re starting from scratch, a sculpting medium can be employed to form the desired shape. Once the pattern is complete, sand it down for a flawless finish.
Following the shaping process, it’s imperative to apply a mold release agent generously over the surface of the master pattern. This step is critical, as it forms a barrier between the resin and the master, preventing them from bonding and allowing for easy demolding once cured.
Fabricating the Mold
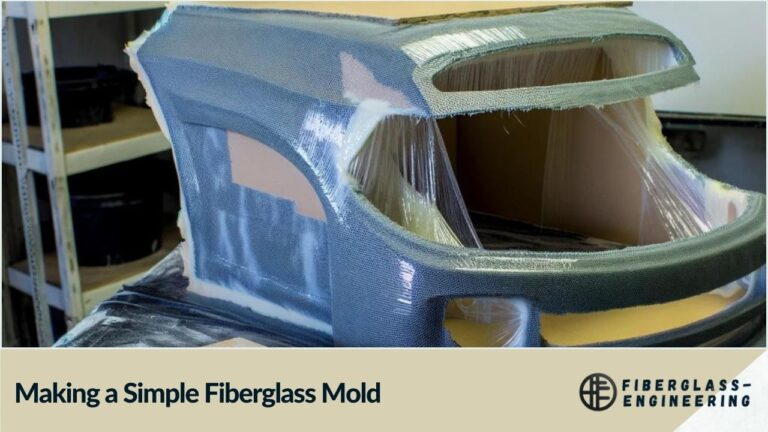
With the master pattern prepped, you can begin the fiberglass mold-making process. Start by cutting the fiberglass cloth into manageable pieces, ensuring that the dimensions accommodate the size of your master pattern. Once prepared, mix the resin according to the manufacturer’s specifications and begin applying it over the master using brushes and rollers.
Start layering the fiberglass cloth onto the master. It is advisable to use multiple layers (typically 3 to 5) for added strength. Each layer should be saturated with the resin, ensuring that there are no air bubbles trapped between the cloth. If air bubbles appear, use a roller to gently push them out. This process requires patience and meticulous care, as the integrity of the mold is directly influenced by how well you handle the fiberglass layers.
Curing and Demolding
Once you’ve completed layering, allow the mold to cure according to the resin’s specifications. This phase can take several hours or even days, depending on the resin type and environmental conditions. During the curing process, it’s beneficial to maintain a stable temperature and minimize any disturbances.
After the mold has fully cured, it’s time to demold. Carefully remove the mold from the master pattern, taking care not to apply excessive force, as this could damage the intricacies of your mold. If you’ve used a proper release agent and executed the layering accurately, the mold should release smoothly.
Finishing Touches and Application
Upon removal, examine your mold for imperfections. Minor blemishes can be sanded down, and when satisfied with the result, you can apply a final coat of mold release to ensure that future castings are easy to extract. Your mold is now ready for use in producing fiberglass parts.
Safety Precautions
While engaging in fiberglass mold making, don’t overlook safety precautions. Always work in a well-ventilated area and wear appropriate protective gear, as the resin emits fumes that can be harmful if inhaled. Proper disposal of materials and cleaning up spills is also crucial to maintaining a safe workspace.
Final Thoughts
The art of crafting fiberglass molds for automotive parts is a rewarding endeavor that merges creativity with engineering. Whether you’re looking to replicate classic car components or design futuristic customizations, mastering this skill opens a plethora of possibilities in the automotive world. With patience, precision, and practice, you can unleash your inner automotive artisan, enhancing both your vehicle’s aesthetic and functional aspects through bespoke fiberglass creations.
