
Bulb Replacement: How Do You Change a Turn Signal Bulb?
The turn signal is an essential component of any vehicle, a simple yet vital feature that communicates a driver’s intentions to other road users. Oftentimes, it is easy to overlook; only when it falters do we realize how dependent we are upon its subtle glow to enhance safety on the road. This seemingly mundane task of bulb replacement can serve as a reflection of our broader relationship with machinery and technology, where the harmony of function and necessity intertwines. In the quest for improved safety and efficiency, understanding how to change a turn signal bulb is paramount. Here, we delve into the intricacies of this process, exploring the rationale behind its significance and the straightforward steps to facilitate a successful replacement.
Understanding the Importance of Turn Signal Bulbs
Turn signal bulbs are more than mere light sources; they are pivotal tools for road safety. Their principal function is to signal an intention to turn or lane change, thereby providing crucial information to fellow drivers, cyclists, and pedestrians. When a bulb burns out, misunderstandings may arise, resulting in preventable accidents or traffic violations. Moreover, many modern vehicles utilize integrated systems that monitor bulb functionality. A malfunctioning bulb can trigger warning lights on the dashboard, alerting the driver to a problem. Therefore, regular maintenance and prompt replacements become not just advisable but essential for the safety of all road users.
Tools and Materials Needed for Replacement
Before embarking on the task of replacing a turn signal bulb, gather the necessary tools and materials. Ensuring you have everything at your disposal will streamline the process and minimize any potential frustrations.
- Replacement Bulb: First and foremost, acquire a compatible turn signal bulb. Consult the owner’s manual or a reputable auto parts store for the correct specifications.
- Screwdriver: Depending on the vehicle make and model, a Phillips or flathead screwdriver may be required to access the bulb housing.
- Gloves: Wearing gloves can help prevent oil or dirt from your fingers from contaminating the bulb and extending its life.
- Towel or Cloth: Useful for cleaning any residue around the bulb area before and after replacement.
The Step-by-Step Process of Changing a Turn Signal Bulb
While the specifics may vary depending on the vehicle, the fundamental steps for changing a turn signal bulb are generally universal. Here’s a systematic approach to guide you through the procedure:
- Locate the Bulb Assembly: Begin by turning off your vehicle and activating the hazard lights. This ensures safety while you work and assists in locating the malfunctioning bulb. Typically, turn signal bulbs are found in either the front or rear light assemblies. Consult your vehicle’s manual to pinpoint the exact location.
- Open the Assembly: In many cases, the bulb assembly can be accessed directly from outside the vehicle. Alternatively, you may need to open the trunk or rear hatch to reach the light compartment. Use a screwdriver if necessary to detach any screws or clips securing the light housing.
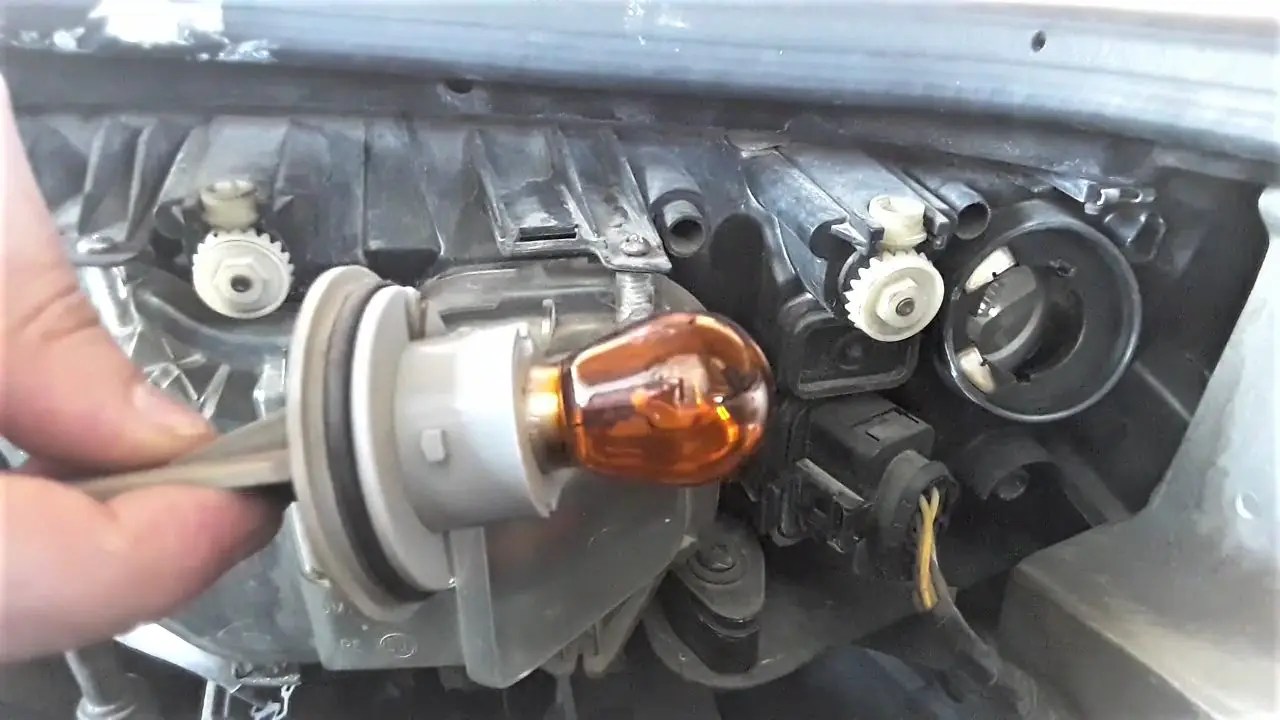
- Remove the Faulty Bulb: Once you have access, gently twist the bulb socket counterclockwise to release it. Afterward, carefully pull the old bulb straight out. Inspect the bulb for any signs of damage, such as a broken filament or cloudiness, which typically indicate that it needs replacement.
- Insert the New Bulb: Take your new bulb and insert it into the socket with a gentle push. Ensure it fits securely in place, avoiding excessive force that could cause damage. Twist the socket clockwise to lock it firmly.
- Test the New Bulb: Before reassembling the housing, turn on the vehicle and activate the turn signal to confirm that the new bulb is functioning correctly. This step is crucial; a quick test mitigates the need for additional disassembly should issues persist.
- Reassemble the Light Housing: Once confirmed operational, carefully reattach the light assembly in reverse order. Make sure all screws and clips are replaced adequately to secure housing as intended.
Disposal and Environmental Considerations
After completing the replacement, consider the ecological implications of disposing of the old bulb. Many bulbs contain trace amounts of hazardous materials, such as lead or mercury. It is imperative to heed local regulations regarding disposal, seeking out recycling programs that ensure environmentally responsible handling.
Conclusion: The Broader Significance of Routine Maintenance
The ability to replace a turn signal bulb represents not merely a mechanical task but extends into the realm of responsible vehicle ownership. By understanding how to execute this simple procedure, individuals contribute to a culture of safety and conscientious driving. This proactive participation underscores an essential truth: the maintenance of vehicles and their components is indelibly intertwined with the broader efforts to address climate change and environmental stewardship. Small acts of diligence, when united, pave the way toward a collective advancement for safer and more sustainable transportation practices. Consequently, the next time a bulb requires replacement, remember its significance—not just in functionality, but in our shared responsibility toward maintaining the delicate equilibrium of safety on our roads.
