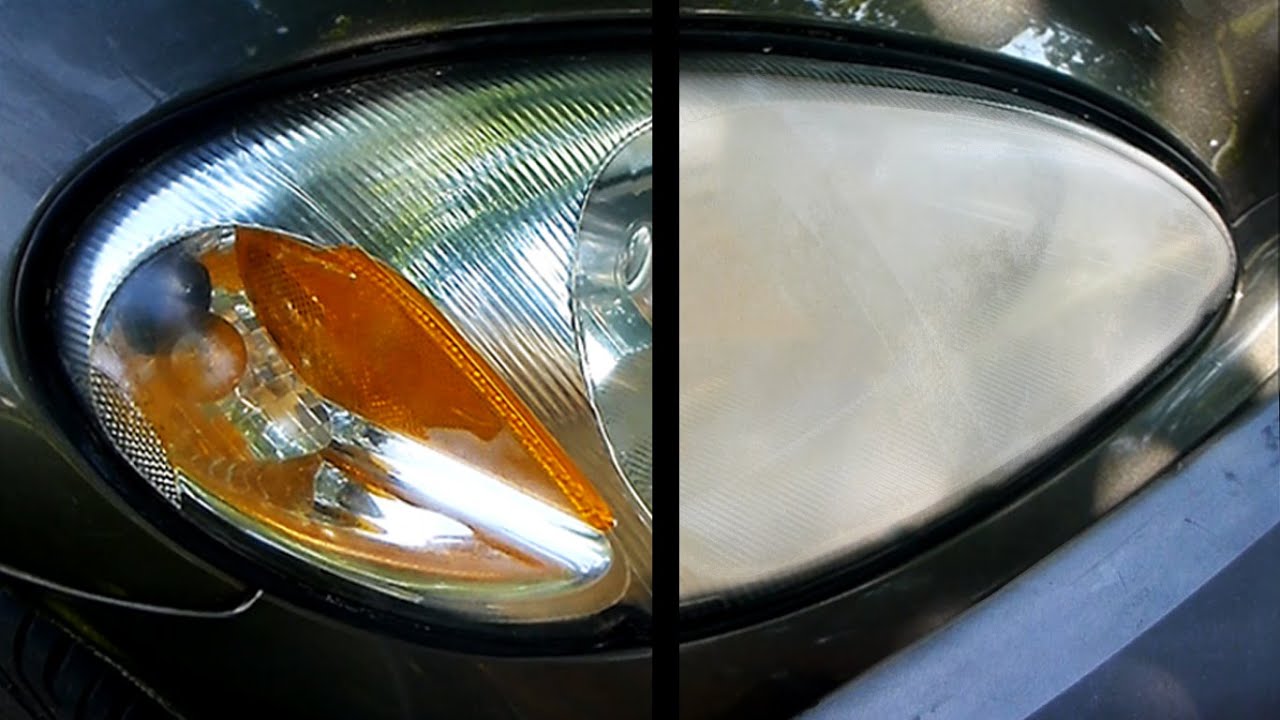
In the realm of automotive maintenance, headlight restoration emerges as a pivotal task, often overlooked yet essential for both safety and aesthetics. As we traverse the roads illuminated by our trusty vehicles, dim and cloudy headlights can impede visibility, increase the risk of accidents, and diminish the overall appearance of our cherished rides. This article delves into the intricacies of headlight restoration, specifically focusing on the pivotal role sanding plays in achieving that coveted crystal-clear finish.
Many car owners have likely observed the gradual degradation of their headlights, succumbing to the elements and pollutants. Over time, the polycarbonate lenses become hazy due to oxidation, UV exposure, and environmental contaminants. While it may seem an unassuming aspect of vehicle upkeep, the clarity of your headlights can influence both nighttime driving safety and daytime aesthetics. This widespread concern hints at a deeper fascination with the relationship between visibility, safety, and the overall condition of our vehicles. A sparkling headlight not only signifies proper care but also reflects the owner’s pride and investment.
Before embarking on the headlight restoration journey, it’s essential to arm oneself with the right tools and materials. The process typically begins with sanding, which serves as the foundation for restoring clarity. But what exactly should you sand your headlights with? The answer lies in a systematic approach to abrasives and grit levels.
Start with a selection of wet/dry sandpaper, which is preferable due to its ability to minimize dust and reduce the risk of additional scratches. Begin with a coarse grit, ideally around 400-grit, which helps to remove the bulk of the oxidized layer. The key is to dampen the sandpaper with water to create a slurry that captures debris, allowing for a smoother sanding experience. As you gently sand the surface, utilize a circular motion to ensure even abrasion, paying close attention to areas with more significant cloudiness.
Once the majority of the oxidation has been addressed, it’s time to progress to a finer grit sandpaper. Transitioning to 800-grit will refine the surface even further. This stage is crucial, as the goal is to eliminate the scratches from the coarse sandpaper and prepare the plastic for polishing. It’s paramount to keep the surface wet; this not only aids in reducing heat buildup but also lessens the potential for further scratching. Patience is the virtue here; thoroughly sanding will pay dividends in the subsequent polishing process.
As you continue through the restoration process, moving to the 1200-grit sandpaper is advisable. This grit further smoothens the surface, making it amenable to polishing. The idea is to transition through finer grades of sandpaper to achieve a glass-like finish before introducing any polishing compounds.
With the sanding complete, attention turns to the polishing phase. High-quality plastic polish or a headlight restoration kit often comes equipped with polishing compounds specifically designed for this purpose. Apply the polish using a foam applicator pad, employing a circular motion akin to the sanding method. As the polish cures and reacts with the plastic, you may begin to see the former clarity of your headlights resurface.
For optimal results, it is advisable to follow up with a sealant. This step ensures durability and protection against future oxidation, extending the life of the restored headlights. Several products on the market offer UV protection, a crucial safeguard against the harsh sun’s rays that wreak havoc on headlights over time.
While the allure of headlight restoration may seem mundane, it embodies a fascination with transformation and rejuvenation. Observing a dull, foggy headlight metamorphose into a shining beacon of clarity complements not only our vehicles but enriches our driving experience. It serves as a testament to our commitment to safety, aesthetic appreciation, and mechanical pride.
It’s important to emphasize that regular maintenance of headlights can prevent the need for more intensive restoration efforts down the line. Simple interventions such as gentle cleaning with soap and water or using specialized headlight cleaners can go a long way in preserving clarity. Moreover, periodic inspections will help address any signs of fading before they escalate.
In summation, the process of headlight restoration is an engaging and rewarding venture. The tools of the trade, namely the various grits of sandpaper, should not be underestimated; they are instrumental in the quest to reveal a clear, safe driving experience. Through diligent application of sanding and polishing techniques, you can ensure that your headlights not only illuminate the road ahead but also embody the pride of ownership that accompanies a well-maintained vehicle. So, gather your supplies and prepare for an endeavor that promises both immediate results and long-term benefits, illuminating the journey ahead in more ways than one.
